Apify launched MCP connectors on June 13, 2026. That means any Apify Actor can now read from and write to your WordPress site through Royal MCP, with an LLM in the driver’s seat. Install Royal MCP, grab the API key, paste two values into Apify’s Universal MCP Connector Actor, and you’re scraping or syncing in about five minutes. Full walkthrough below.
What Apify Just Shipped
Apify is the big web-scraping platform — thousands of pre-built “Actors” that crawl, scrape, and extract data from sites all over the open web. Until now, almost all of that work stopped at the data layer: the Actor scraped, the data went into Apify’s dataset, and getting that data into your downstream apps (a CMS, a CRM, a notification channel) was a separate problem you solved yourself.
Their MCP connectors launch changes that. Actors can now connect to external apps through the Model Context Protocol — the same standard Claude and Cursor use to talk to Royal MCP. The launch shipped with five curated connectors (Notion, Slack, GitHub, Sentry, Supabase) plus a Universal MCP Connector Actor that accepts any MCP server URL.
Royal MCP is “any MCP server URL.” So an Apify Actor — scraping a competitor’s product catalogue, monitoring a marketplace for new listings, harvesting public-records data — can now hand the result directly to your WordPress site as a new draft post, an updated WooCommerce product, or anything else Royal MCP exposes (roughly 126 tools at the time of writing).
This guide is the step-by-step. Five minutes once you know the flow.
What You’ll Need
- Royal MCP installed and enabled on the WordPress site you want to integrate. If you haven’t done that yet, the Connect Claude to WordPress walkthrough covers the install in two clicks.
- A WordPress API key from Royal MCP’s settings (WP Admin → Royal MCP → Settings → General Settings).
- An Apify account. The free tier’s monthly credit covers a generous amount of testing.
That’s it. No bridging code, no JSON config files, no separate authentication server.
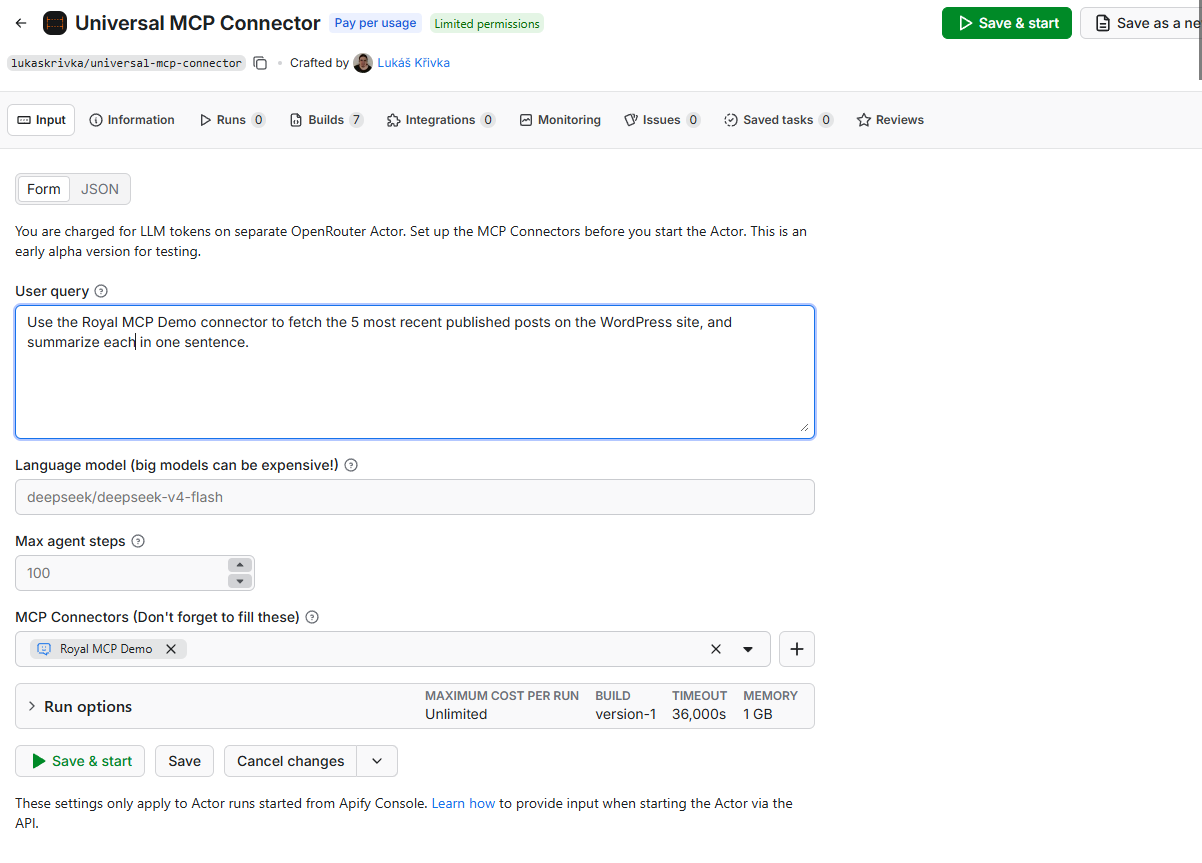
Step 1 — Open the Universal MCP Connector Actor
In Apify Console, navigate to the Universal MCP Connector Actor (by Lukáš Křivka). This is the general-purpose Actor for connecting to any MCP server — it takes a natural-language query and a connector and lets an LLM drive the integration.
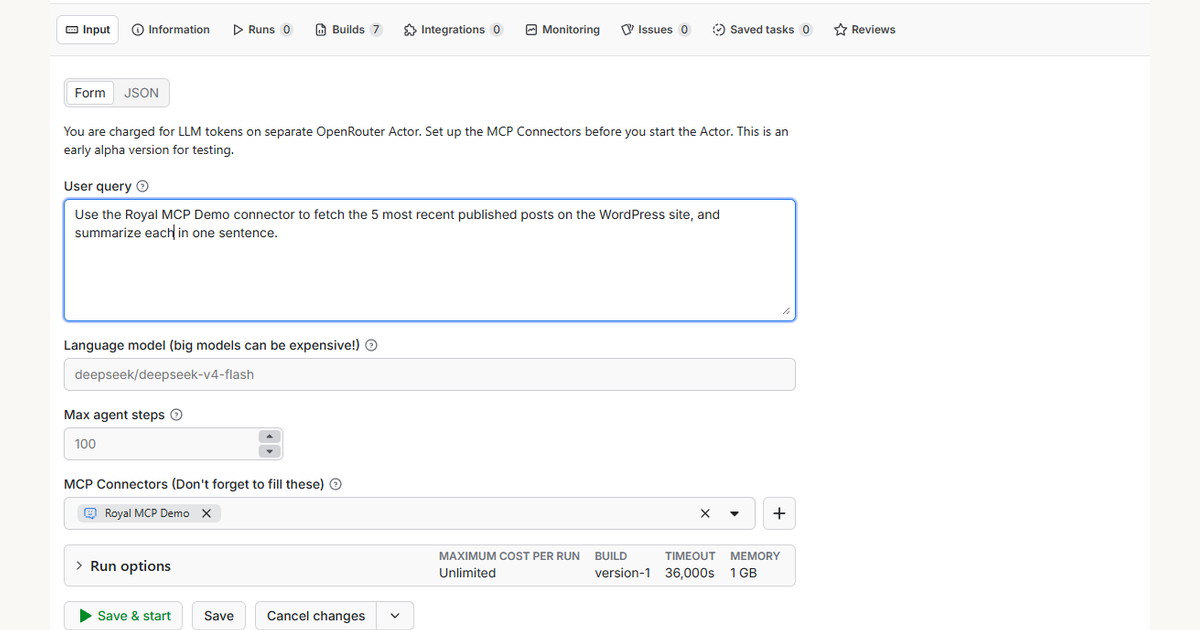
Click the Input tab. You’ll see a form with the actor’s configuration: a user query field, language model dropdown, MCP Connectors selector, and run options.
Step 2 — Add Royal MCP as a New Connector
Scroll down to the MCP Connectors field. Click the + button next to the empty dropdown. Apify opens an “Add new MCP connector” dialog. Fill it in like this:
- Name: anything memorable (e.g.
My WordPress Siteor the site domain) - MCP server URL:
https://YOUR-SITE.com/wp-json/royal-mcp/v1/mcp(replaceYOUR-SITE.comwith your domain) - Authentication method: select API key
- API key: paste the WordPress API Key from Royal MCP’s settings page (use the “Copy” button next to the field — avoid manual selection so you don’t pick up trailing whitespace)
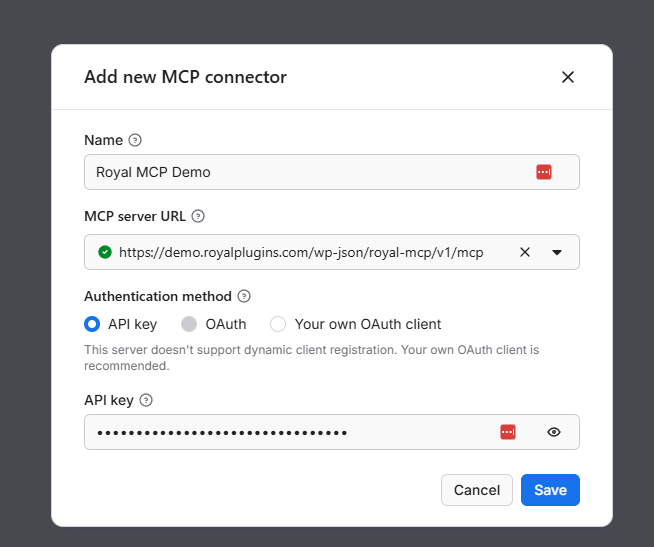
Click Save. The connector validates the URL, exchanges credentials, calls Royal MCP’s initialize handshake, and discovers the available tools (around 67 core WordPress operations plus another 59 if you have integration plugins like Elementor, WooCommerce, ACF, or Yoast active). When the dialog closes, the connector is selected in the dropdown.
Apify advertises an OAuth Dynamic Client Registration path, but their auto-detection currently doesn’t recognise Royal MCP’s (fully RFC-compliant) DCR support. Until that’s sorted on Apify’s side, API key is the cleanest route. For Royal MCP specifically, the “Your own OAuth client” path also works if you prefer not to hand over an API key — you’d register a client manually via https://YOUR-SITE.com/register and paste the returned client_id into Apify.
Step 3 — Compose the User Query
The User query field is where you describe, in plain English, what the Actor should do. The LLM reads your query, looks at the tools your connectors expose, and figures out the call sequence on its own.
For a first run, start with something read-only and easy to verify. Something like:
Use the My WordPress Site connector to fetch the 5 most recent
published posts on the WordPress site, and summarize each in one sentence.
Pick a cheap language model from the dropdown (the default deepseek/deepseek-v4-flash is fine and costs fractions of a cent per run). Leave Max agent steps at 100.
Check that your connector is selected in the MCP Connectors field at the bottom of the form. That’s the most common “why didn’t it work?” — the dialog stored the connector but you forgot to actually pick it from the dropdown for this run.
Step 4 — Save & Start
Click Save & start in the top right. Apify spins up the Actor. You’ll see a Run page with a status header (Running, $0.00X, timestamp, elapsed seconds) and a spinning indicator. Reads typically finish in 20–40 seconds; writes a touch longer.

Step 5 — Read the Output
When the run finishes, the status flips to Succeeded and the Output tab populates. Click into it to see what the LLM came back with.
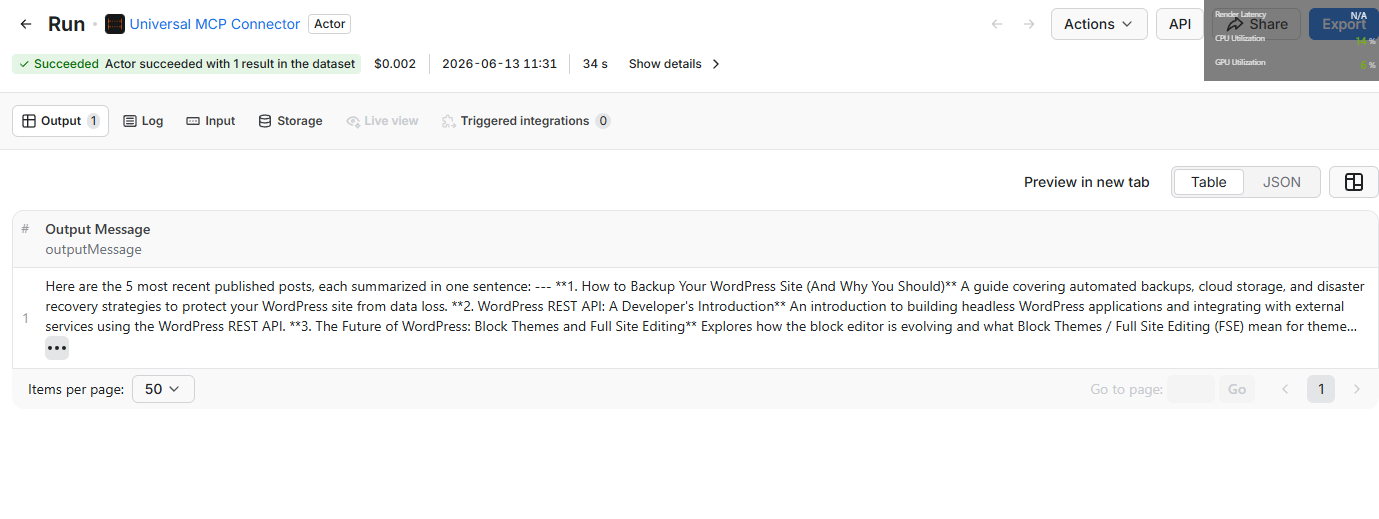
That’s the full loop. The Actor opened a session with Royal MCP, called wp_get_posts (probably with post_status=publish and posts_per_page=5), parsed the JSON-RPC response, and summarised it — all because you typed a sentence and clicked Start.
If you want to confirm writes work too, swap the query for something like:
Create a draft WordPress post titled "Apify connection test"
with body "Posted via Apify Universal MCP Connector."
The LLM picks wp_create_post, drafts the post, and returns its new ID. Check WP Admin → Posts to verify.
What You Can Do Now That Apify Talks to WordPress
The interesting workflows aren’t the one-shot queries — they’re the multi-step pipelines where Apify Actors scrape something off the open web and Royal MCP becomes the WordPress write surface. A few starting points:
- Competitive monitoring → draft posts. An Actor scrapes a competitor blog daily; the LLM drafts a “here’s what they’re publishing this week” summary post in your WordPress, set to Draft for you to review.
- Price monitoring → WooCommerce updates. An Actor watches Amazon prices on the products you sell; if a competitor undercuts, Royal MCP updates your WooCommerce price (or flags the product with a custom meta field).
- Public-records harvesting → custom post types. An Actor pulls new licence-board filings, real-estate listings, or court records; Royal MCP creates one custom post per record with all the structured fields populated.
- Brand mention monitoring → comment moderation. An Actor crawls forums for mentions; the LLM filters for sentiment and, on negative mentions of your products, drafts a response comment for you to approve.
- Lead enrichment → user profiles. An Actor scrapes LinkedIn or public business directories for a contact; Royal MCP creates or updates a WordPress user with the enriched data in user meta (perfect for membership and CRM plugins).
None of these need a single line of glue code. The LLM in the middle is the glue.
Common Gotchas If Something Doesn’t Work
Despite the wording, this error usually isn’t about the key value. The first thing to rule out is whether Apify’s request is even reaching your server. Apify’s MCP client identifies itself with a bare node User-Agent string, which some WAFs (including GuardPress’s default settings and Cloudflare’s Bot Fight Mode) classify as a suspicious bot and return 403 to. If you have either active, either whitelist /wp-json/royal-mcp/* and /.well-known/oauth-* paths in the WAF or temporarily disable the bot block to confirm.
Make sure your WordPress permalinks are not set to “Plain”. Visit Settings → Permalinks and save once after installing Royal MCP — this registers the REST routes Apify needs. Skipping this step is the #1 cause of “tool discovery returned empty” on freshly-installed sites.
Cloudflare has three separate panels that can block automation traffic: Bot Fight Mode, Block AI Bots, and AI Crawl Control. Our Cloudflare-and-MCP write-up walks through which toggles to flip and which to leave alone. Apify’s probe is essentially indistinguishable from any other Node-based automation client, so the same fixes apply.
Royal MCP fully implements RFC 7591 Dynamic Client Registration plus RFC 9728 protected-resource metadata discovery, so this message is a bug on Apify’s detection side, not a Royal MCP limitation. For now, use API key auth (works fine) or the “Your own OAuth client” option with a client manually registered via POST https://YOUR-SITE.com/register.
For anything not covered above, the Royal MCP troubleshooting checklist diagnoses most issues in under a minute.
Get Royal MCP
Free on the WordPress plugin directory: wordpress.org/plugins/royal-mcp/
Or install directly from your WordPress admin → Plugins → Add New → search “Royal MCP.”
The Apify integration ships in Royal MCP’s standard build — no separate add-on, no licence key, no toggle. If you already have Royal MCP installed for Claude or ChatGPT, Apify just works against the same endpoint.